 Our Almond Tree in our Yarden has seen it all. It could be as old as the house itself, going by what people who have been associated with our family since its construction in 1911 have remembered. Whenever old relatives who have not returned to this place where they had been in their younger days in the 1920s, 30s and 40s met me they would inquire curiously if the Almond Tree was 'still there'! They referred to it as 'tree'. Most of them were from 1930s and 40s which testifies that it was already a tree at that time. See a part of the tree in all its glory in the 'greener months' of 2008. Pictured left with the house.
 Terminalia catappa [click] is the botanical name of this Indian Almond variety. It sheds leaves twice a year, in March and September.
  The tree had grown tall and higher than our first floor roof. What is seen in the pictures above and left is new growth. When the leaves grow full and lush, it provided absolute shade underneath.
  Its branches had spread far and wide and the fallen leaves, flowers and fruit would clog the balcony pipe.
 .JPG)

 With the property getting divided into two in 2009, there was now limited space for composting, though I tried to do in the available space in one corner near the Aegle marmelos [Bilwa]. [Pictured left]. It was too much volume to handle now. What to do? In the summer months, much of them were useful for the hearth but in the September fall they are not fully dry as it is the rainy season. Difficult to burn. When we came to live in this property in 1998, the volume was double. This picture shows the pile after the tree was pruned and the digital camera had come. I could manage the mountainous volume by composting them in a large pit near the mango tree, now not in our portion of the plot.
 The best option was to reduce the tree branches to about half so that there would be less leaves to handle. A wood cutter was summoned. The electric wires had to be disconnected during the operation.
  The wood cutter and his son Murthy did the job. Murthy further did the cutting of branches smaller for our firewood. This is the area where a new house has now come up. Picture left.
.jpg)
After removal of the higher branches and half of the main trunk, the tree was now this size. See the top right portion of this picture taken in 2012 when work of the new house was going on.

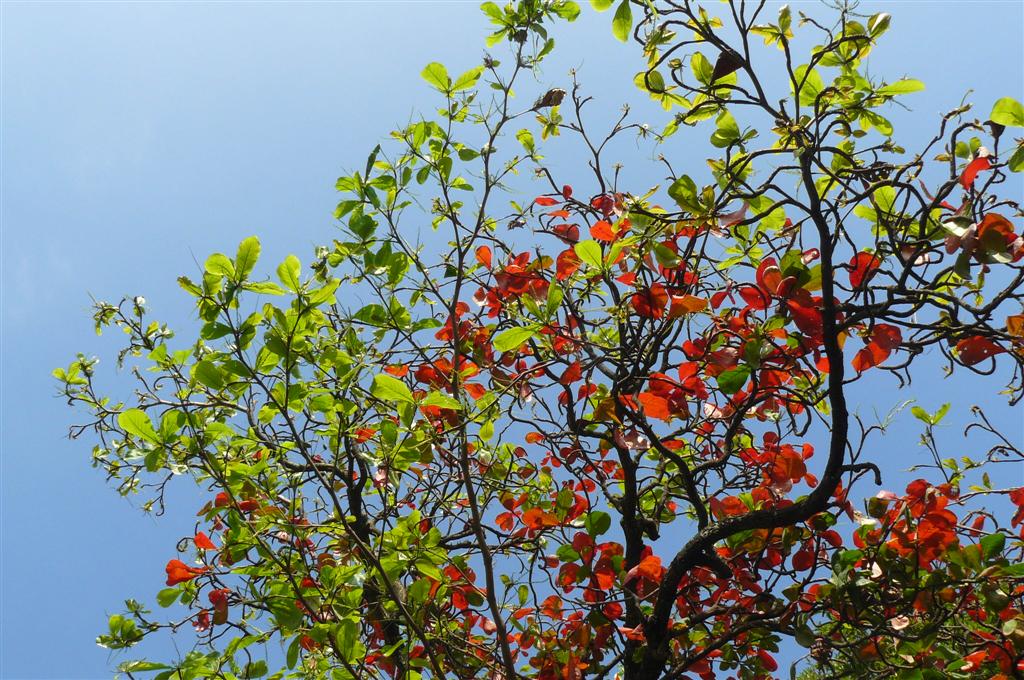
The red leaves before fall is always a joyful sight against a blue sky, esp. when they were lit by the sun.

I cut up a leaf for fun.
.JPG) The tree bears fruits. Sometimes, breaking the fibrous nuts is worth the effort. Raw almond has its taste.
The tree bears fruits. Sometimes, breaking the fibrous nuts is worth the effort. Raw almond has its taste. 
 Many birds chose the high branches of this beautiful almond tree to rest in the shade of the huge leaves. Now the high branches are gone.
 .jpg)
It is a favourite tree for the tailorbirds to make their nests.
.JPG)
.JPG) The Weaver Ants too were fond of these huge leaves to build nests folding up the leaf or joining a few leaves together.
The Weaver Ants too were fond of these huge leaves to build nests folding up the leaf or joining a few leaves together. The tree top was clearly visible in this satellite image from 2010. Red circled.
 Now see it closer, from the topmost balcony of the house. All those leaves would come down! They were the new growths from the new branches. See how lush the growth is. I could break the branches with a hooked knife attached to the tip of a long bamboo pole. Even then the leaves were too much for me.
  I decided to further cut the branches of the tree to allow more light in the Yarden and also to have lesser leaves because there was no proper method of disposing them now. It was this size and one large side branch needed to be cut.
  My friend Ramu gave me a beautiful saw with a telescopic handle. The one in the above picture is now sawed down with that. I had sawed about 75% but suddenly got doubtful about where it would fall, though my estimate proved to be near correct. I made an SOS to Ramu to come for help. He arrived in ten minutes, in spite of being busy at that very time. "Hey, is that all, why do you fear?" It was no SOS to him! He sawed the remaining portion for a couple of minutes.... THUD! And went away on his errand.
  The branch fell on the arch making it crooked and ugly. The arch was a gift from my friend Meera, another plant lover. Now my garden plan may change for the front yard because of this not unexpected damage.
 The branch and the arch in one frame - fish eye lens - taken a few days earlier. This is probably the last of the arch images in its original shape.
  "See the saw." An Indian saw the German Saw. Here it is!
It helped me make firewood size pieces also, easily, without much effort. When we have the right tools, things get a lot easier.

This is what remains now, but I expect it come back. And this time, I'll be ready with my tools to shape the way I want without the tree causing problems but I'll see that some tailorbirds would make nests by April next when it is their season.
 I had made my own leaf plate too once just for fun, by joining about 7 leaves and had my lunch on it.
This post turned out to be a mountain out of a mole hill! Thanks for reading.

.JPG)
.JPG)
.jpg)
.jpg)
.jpg)
.jpg)
.jpg)
.jpg)
.jpg)
.jpg)
.jpg)
.jpg)
.jpg)
.jpg)
.jpg)
.jpg)
.jpg)


.jpg)


.jpg)

